Intro text

Now I'm not into simple stuff, I love complexity! What started out as "I want a panel to fit into my dining room window", now has become a full blown hobby. In particular, I love Tiffany lamps… I love the art deco era and Louis Comfort Tiffany has produced some amazing work which survives to this day, in particular, their lamp shades and panels.


Friday, January 31, 2014

My inspiration

I am inspired by many things, especially plants and flowers that occur in nature, architecture, simple and elegant design.  I love colour and texture.

expressing emotions

etc…


Project - 16" Poppy Lampshade - Final Touches

Here are the pictures of the final lampshade.  It's now gracing Ed's place.


Here you can see the colour of the patina in the lamp shade when it is not lit.  I chose a mix of 60% black and 40% copper patina to give it a brown, somewhat brassy effect.  It matches the lamp base perfectly.


Here is a top down look at the shade.  Notice how the colour swirls of the background fit perfectly?  To do this, I had to put my pattern onto the glass beside one another.  It was tough to cut sometimes as I had to do the cuts in a certain sequence.  Also I had to be very careful not to ruin any of the pieces while cutting.  


This is my favourite vignette of the lamp shade.  The red poppies against the blue background is very dramatic.


The textured glass is from a piece of Oceana glass that I picked up years ago.  It's no longer made.  :(


For the centres of the flowers, I used some choice pieces from the background glass. Oceana, I think it is either 607 or 702?


Oops, I have to be more thorough with my cleaning and buffing!  :)

Here is a picture of it on a lamp base:


Project - 16" Poppy Lampshade - Soldering and Applying Patina

Here are some pics


The filigree here is taped on, not yet soldered on.  It was tough going, but I managed to solder them on successfully.  The trick is to finish the lamp completely, that is clean it up, patina it and rub finishing compound on to the entire lamp, then you can work on the pieces of the filigree.  I did the same to the filigree.  I then didn't edge them all on, instead I tack soldered the corners, then I cleaned up the lamp again, applied patina and re-buffed it up.  

I think there may be an easier way to do this, but I'm not too sure!


Project - 16" Poppy Lampshade - Fitting and Foiling

Reducing the pattern to 97% paid off!  Fitting was a breeze, I only had to make adjustments to 5% of the pieces, and they were minor adjustments.  What a timesaver.

I can now immediately move to foiling


the girls just love to be closely while I work.


there's Izzy, she's supervising my work.


Almost done the fitting and foiling…


Project - 16" Poppy Lampshade - Cutting and Grinding

In the past, I've done both dome lamps and cone lamps, since this is a cone lamp, the fitting will normally be tighter, so in order for me to do less soldering, I've taken a hint from a fellow stained glass artist, who photocopies her patterns to be smaller, normally 95-97% of actual size.  I'm err'ed on the side of caution and have photocopied to 97%.  This will leave me with a margin of error to be smaller, I may have to grind a bit more, but it's better than having solder lines to be too large.

Cut and ground the leaves first.  I organized them into the big leaves first, then cut the pieces off --  this was a time saver.


Had problems with selecting the parts of the background to use.  I decided to do a little sample first to see how the colours meld together.  Looking OK, still not sure of the background.


Did more… take a look at the background now…


it works beautifully.  Here is a panel, with the borders.


At this point, Ed came to take a look and since it's three repeats, we played around with moving the leaves, centres and flowers around to optimize on the flow and colours together.


Project - 16" Poppy Lampshade - Introduction and Glass Selection

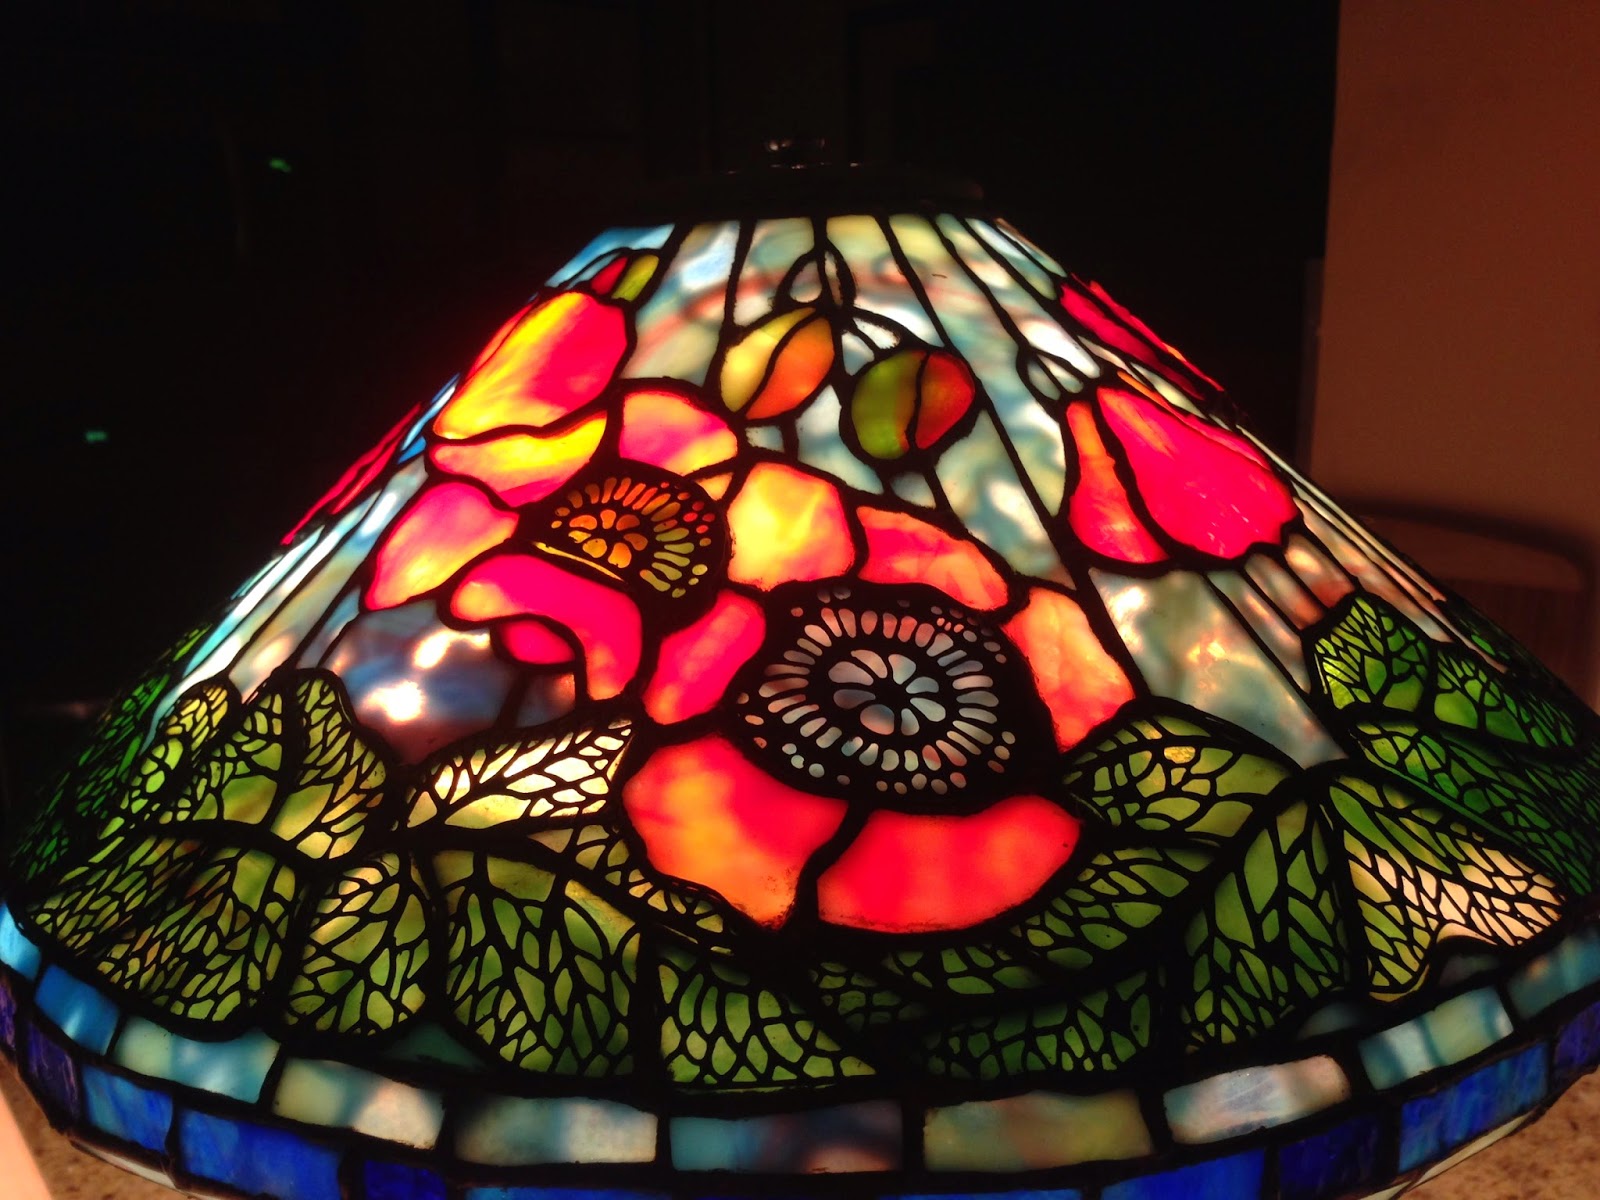
My next project will be the 16" Poppy Lampshade.  I love the filigree work on this one.  It's a small one, at 16", it's cone shaped and will grace Ed's condo.

I'm taking inspiration from Scott Rigg's version:  16" poppy.  What I like about this particular lamp shade is the use of the background glass and the use of filigree, which I have never done before.  Scott uses the background as one contiguous piece which draws the eyes around the shade.  Absolutely stunning.

Ed loves bright colours and has a fascination with water.  He has two these two pictures on his living room wall.


The glass which I am using uses the same colours.  The background is key to this design and I'm using Oceana #702, which is a four colour mix, silver (which gives it the yellow), blue, greens and gold pinks.  For the poppies, I'll be using a salmon (orangey pink) colour Uroboros, plus a rippled Oceana which I have been hoarding for a number of years.  Trust me, you can't get this stuff anymore.

Here is my glass selection:

I'll use this special rippled glass for some of the poppies, the rippling will simulate the opening of the flower buds as it occurs in nature.


This will be the background glass, notice the movement of the steaks of colours and how it matches Ed's pictures.  It is way more difficult to do, but keeping the effect of the movement intact, in my opinion will make the lampshade seem alive.


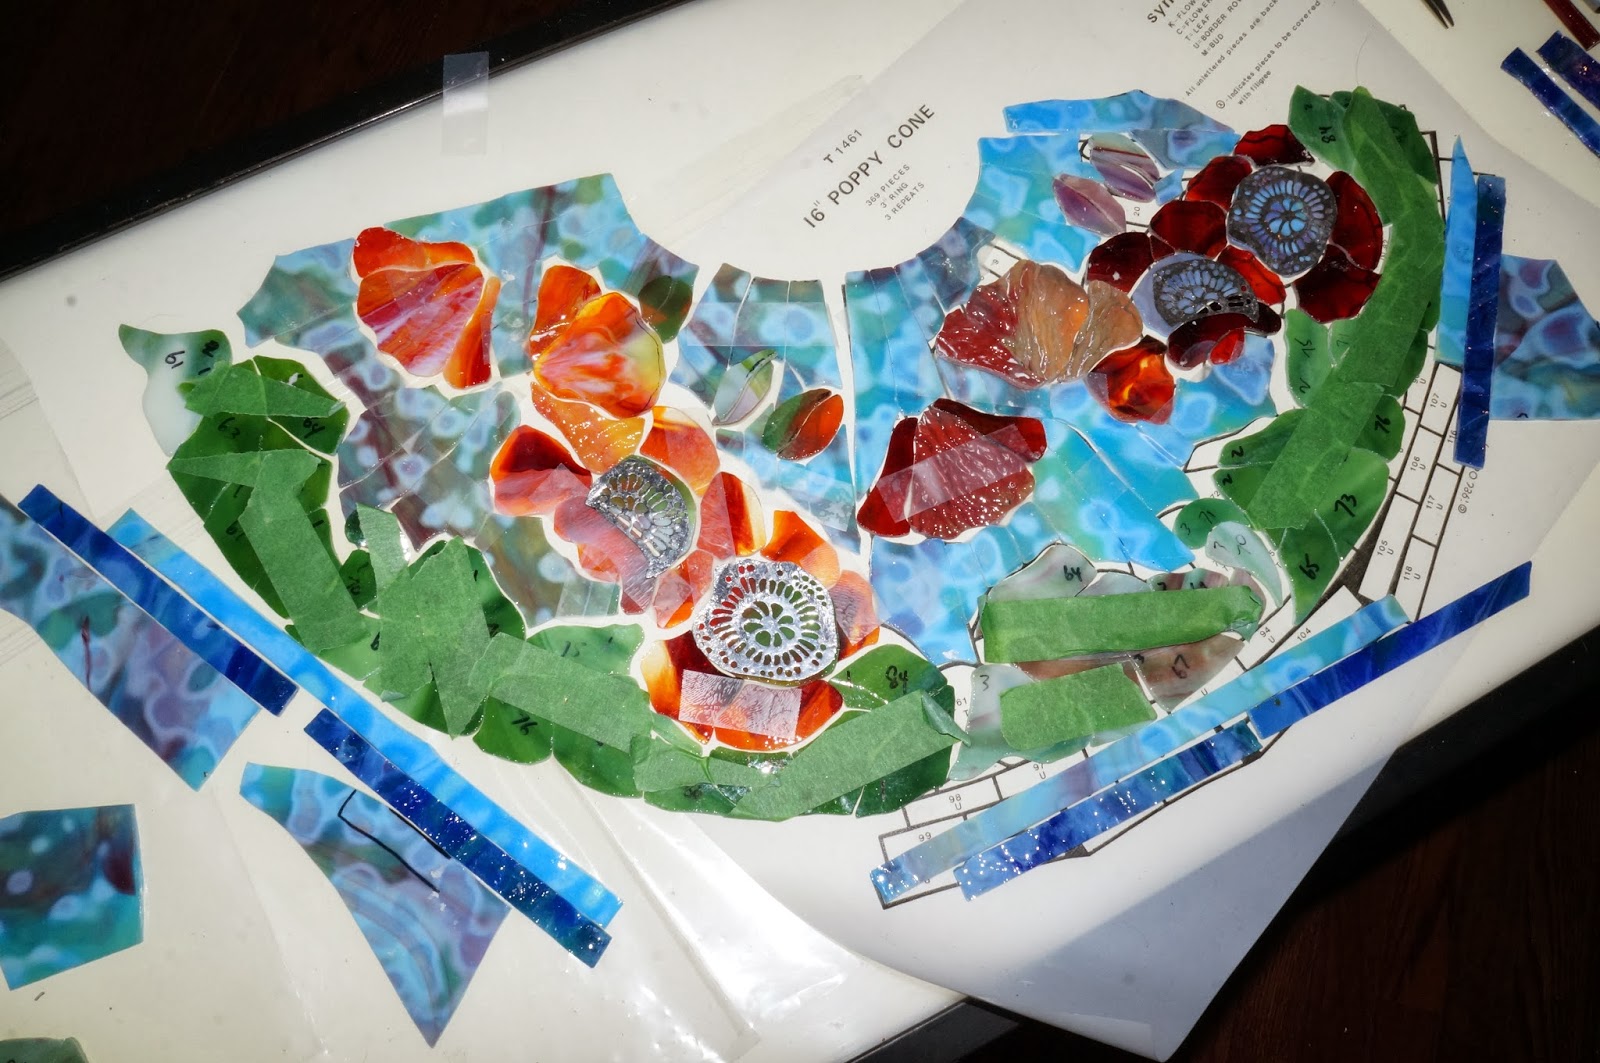
Here I am, trying to fit the pattern pieces optimally to have the colours appear in the places that i want them to.


I haven't yet picked the main poppy colour, I'm looking for a salmon colour or orangey pink, pinky orange maybe?  A nice padparadscha?  is that even the name of a colour?  

I have some ideas for the leaves.  My goodies from Uroboros will arrive next week, so I'll have plenty more to pick from.

Had some help from friend Betty who has an extremely good eye and is an amazing photographer, we've finished the glass selection for Ed's lamp, here it is,

The greens for the leaves.


The main glass for the poppies.  I'll be using the variations in the colours to select choice pieces for the flowers.


Here is the entire palate.